Managing Languages
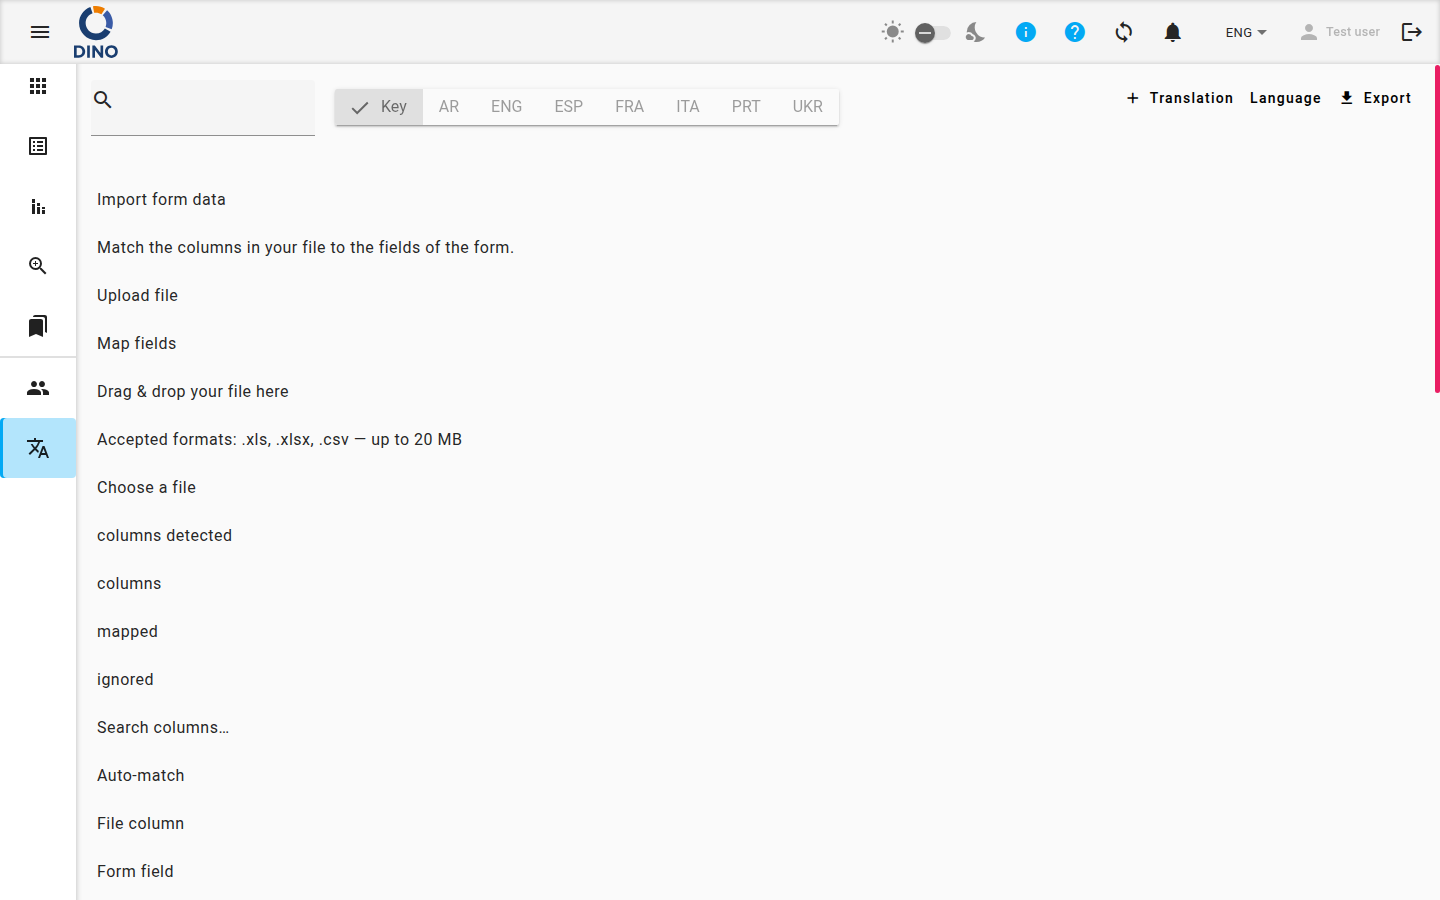
The Languages page allows administrators to manage all the translated text used throughout Dino. From here, you can browse, edit, and add translations, manage which languages are available, and export translation files for backup or editing.
Administrator access only
This area is only visible to users with the Administrator role. If you cannot see it in the navigation, contact your system administrator.
Browsing Translations
The main view shows a list of all translation entries. Each entry displays its key — the internal identifier used by the application — and, when a language is selected, the corresponding translated text.
A loading indicator is shown while the translation data is being fetched.
Filtering the List
Two controls at the top of the page let you narrow down the entries shown:
- Keyword search — type any word to filter entries whose key or translation contains that text. The list updates as you type.
- Language selector — a row of buttons shows Key and one button for each available language. Click a language name to display that language's translations alongside each key. Entries with no translation for the selected language are shown as (No translation).
Editing a Translation Entry
- Click on any entry in the list to open the Edit Translation dialog.
- The dialog shows the key and a text field for each available language.
- Update the translations as needed.
- Click Save to apply your changes, or Undo to close without saving.
You can also permanently remove an individual entry from this dialog by clicking the Remove button. This deletes the translation key and all its associated translations.
Warning
Removing a translation entry is permanent. The key and all its language values will be deleted.
Adding a New Translation Entry
Use this when you need to add a translation key that does not yet exist in the system.
- Click the + Translation button in the toolbar.
- The Add Translation dialog will open. It contains one text field for each currently active language.
- Enter the translation text for each language as needed.
- Click Save to add the new entry, or Undo to cancel.
A confirmation message will appear briefly after the entry has been saved.
Managing Languages
Use this to add a new language, update an existing language's translations, or remove a custom translation set.
- Click the Language button in the toolbar.
- The Language Settings dialog will open. It shows a list of available languages and provides the following actions:
- + button to add a new language.
- Click a language name in the list to select it and view a preview of its translations.
- Update translation (with a language selected) to upload a new JSON file.
- Remove custom translation to delete the custom translation data for the selected language.
Adding a New Language
- Click the + button at the top of the dialog.
- A form will appear asking for a language label (the name that will appear in the interface, for example "French" or "fr").
- Optionally, upload a JSON translation file by clicking Add JSON and selecting a file from your device. The file's contents will be previewed before saving.
- Click Save to add the language, or Undo to cancel.
Viewing an Existing Language
Click a language name button to select it. The dialog will show a preview of all the translation keys and values currently stored for that language.
Updating a Language's Translations
With a language selected, click Update translation to upload a new JSON file. The dialog will preview the changes — new keys added and modified keys — before you save.
- Click Update translation and select a JSON file from your device.
- Review the preview showing added and modified rows.
- Click Save to apply the update, or Undo to cancel.
Removing a Custom Translation
With a language selected, click Remove custom translation to delete the custom translation data for that language.
Warning
This removes the custom translations for the selected language. The language itself may remain in the system but its customised content will be lost.
Exporting Translations
You can download the translation data for any language as a JSON file.
- Click the Export button (download icon) in the toolbar.
- The Export dialog will open showing a list of available languages.
- Click the name of the language you want to export. A preview of its translation data will appear on the right.
- Click Download to save the file to your device.