Projects
The Projects page in Dino lets you manage all your structured project records. You can view a sortable list of projects, add new ones, edit existing ones, delete them, import data in bulk, and export the list for offline analysis. The page also offers powerful filtering tools to quickly find the project you need.
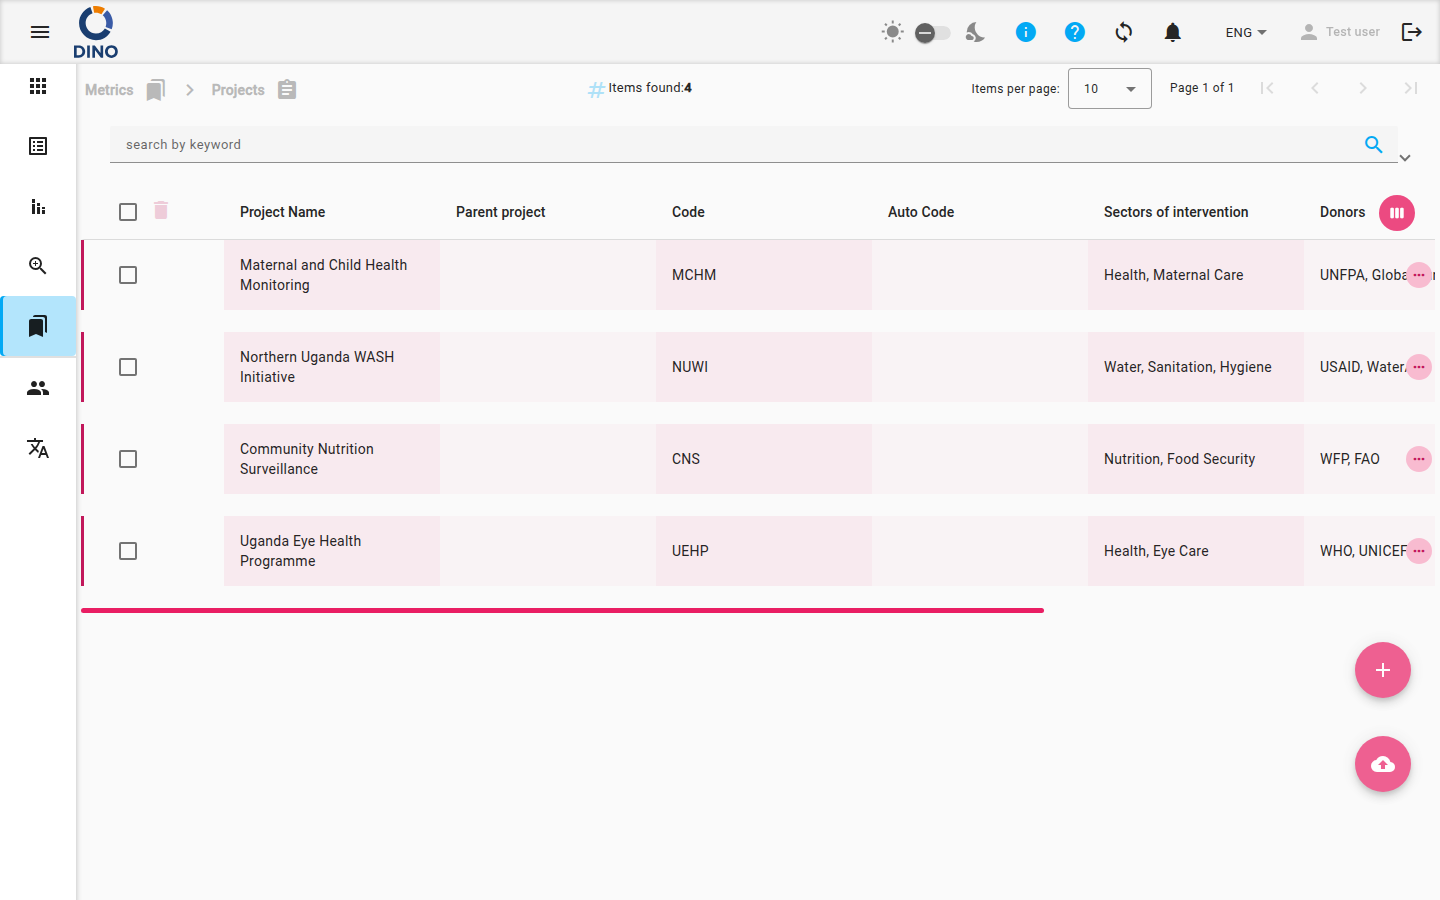
Navigating to Projects
To open the Projects page, expand the Metrics section from the main navigation and select Projects. The browser URL will end with /metrics/projects.
Understanding the Project List
The main table shows a list of all projects. Each row corresponds to one project and displays the following columns by default:
- Project Name – The name of the project. You can sort the list by this column.
- Parent Project – The higher-level project this project belongs to, if any.
- Code – A manually assigned project code.
- Auto Code – An automatically generated code. This field is read-only and cannot be edited.
- Sectors of Intervention – The sectors the project focuses on.
- Donors – The funding sources for the project.
- Start Date – The date the project begins.
- End Date – The date the project ends.
Hidden columns (ID, Creation Date, and Additional Attributes) can be shown by clicking the Customize columns button (the icon looks like a week view) at the top-right corner of the table.
Read-only fields
The Auto Code field is automatically generated and cannot be changed. It will appear grayed out in the edit dialog.
The top toolbar displays the total number of items found and a paginator. You can choose how many projects to view per page.
Managing Projects
Adding a New Project
- Click the Add New floating button (the circled + icon) at the bottom-right of the screen.
- A dialog opens where you fill in the project details. Required fields are marked accordingly.
- Press Save to create the project. It will appear in the list immediately.
Editing a Project
- In the row of the project you want to change, click the edit icon (pencil).
- Modify the fields in the dialog. The Auto Code field will be grayed out.
- Click Save to apply your changes.
Viewing a Project
- Click the view icon (eye) in the project row to open a read-only version of the project details dialog.
Deleting a Project
- Click the delete icon (trash can) in the project row.
- Confirm the deletion in the pop-up. The project will be permanently removed.
Deleting a project
Deleting a project removes it from the system. This action cannot be undone. Ensure you have selected the correct project before confirming.
Searching and Filtering
The search and filters bar sits below the breadcrumbs. You can:
- Search by keyword – Type any term in the keyword field; the list filters automatically.
- Filter by date range – Use the From date and To date pickers to narrow down projects by start or end date.
- Apply additional filters – Click the filter list button (funnel icon) to open a dialog with more advanced filters, such as sectors, donors, or other custom attributes.
- Save and load filter presets – Use the preset manager to save your current filter combination and reload it later.
Filter chips appear below the filter bar, showing active filters. You can remove individual chips by clicking the cancel icon on each.
Exporting and Importing
Exporting Projects
- Click the export button (cloud download icon) in the filter bar.
- Choose the export format (e.g., CSV, Excel) and the columns you want to include.
- The file will be downloaded to your computer.
Importing Projects
- Click the import floating button (cloud upload icon) at the bottom-right.
- Upload a properly formatted file (e.g., CSV or Excel). The system will create or update projects based on the data.
- Review the import results for any errors or warnings.
Bulk Actions
You can select multiple projects using the checkboxes at the left of each row. Once at least one project is selected, the toolbar above the table shows bulk actions:
- Delete selected – Removes all selected projects after confirmation.
- Edit selected (bulk form edit) – Opens a dialog where you can edit a common field for all selected projects at once.
After bulk editing or deleting, the list updates automatically.