Notifications
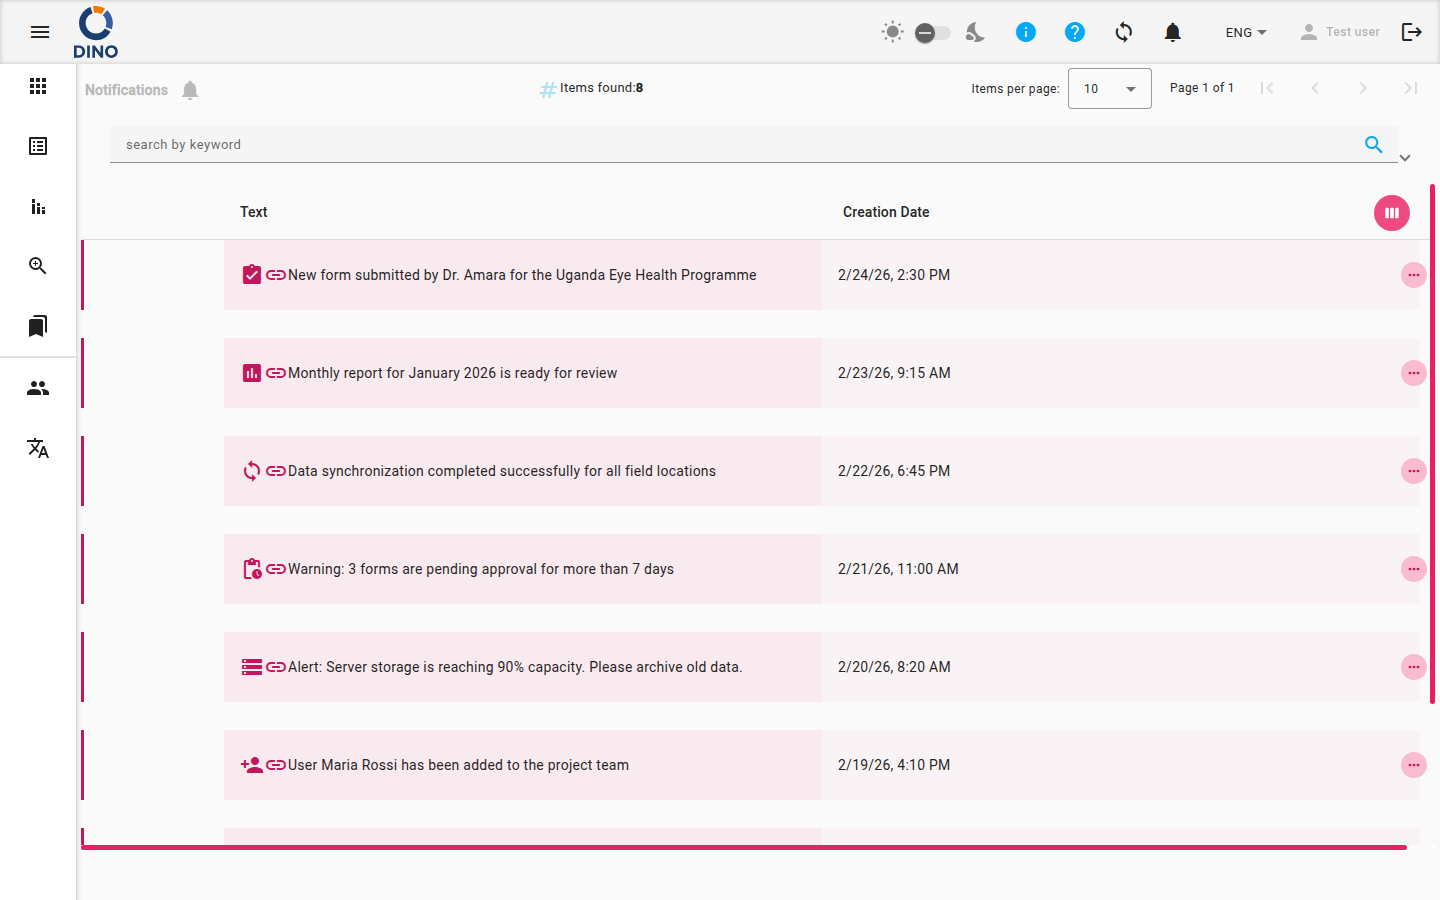
The Notifications page shows all messages sent to you by the system or your administrator. From here you can browse, search, and open individual notifications, including ones that link directly to a relevant area of the application.
Reading Your Notifications
The list displays every notification you have received, showing its message text and the date it was created.
Notifications you have not yet opened appear highlighted in the list so you can spot them at a glance. A small link icon next to the message text indicates that the notification will take you somewhere when clicked.
The total number of notifications matching your current search is shown at the top of the page.
Searching and Filtering
Use the filter bar above the list to narrow down what is shown.
Search by keyword
- Click inside the search by keyword field at the top of the list.
- Start typing any word or phrase from the notification text.
- The list updates automatically as you type.
- To clear the search, click the × icon that appears inside the field.
Filter by date
- Click the From date field and select a start date from the calendar.
- Click the To date field and select an end date.
- The list will show only notifications created within that date range.
- To remove a date filter, click the × icon next to the relevant field.
Navigating the List
If there are more notifications than fit on one page, use the pagination controls at the top of the list to move between pages. You can jump to the first or last page, or step forward and backward one page at a time.
Opening a Notification
Click on any row to open that notification.
- If the notification contains a link (shown by the link icon next to the message), clicking it will mark the notification as read and take you directly to the relevant page in the application.
- If the notification does not contain a link, clicking it will expand the row to show its full content in place.
To collapse an expanded notification, click its row again.
To expand or collapse all rows at once, use the fold/unfold button above the list.
Customising the Columns
You can change which columns are visible in the list.
- Click the column selector button (grid icon) in the top-right corner of the table header.
- A panel will open showing all available columns.
- Toggle the columns you want to show or hide.
- Close the panel when done — your selection is applied immediately.
Marking as Read
When you click a notification that has a link, it is automatically marked as read. Notifications without a link are not automatically marked as read when you expand them.