Import Data
The Import Data page lets you bulk-upload submissions into a form schema from an .xls, .xlsx, or .csv file. A two-step wizard guides you through uploading the file and mapping the file’s columns to the form’s fields.
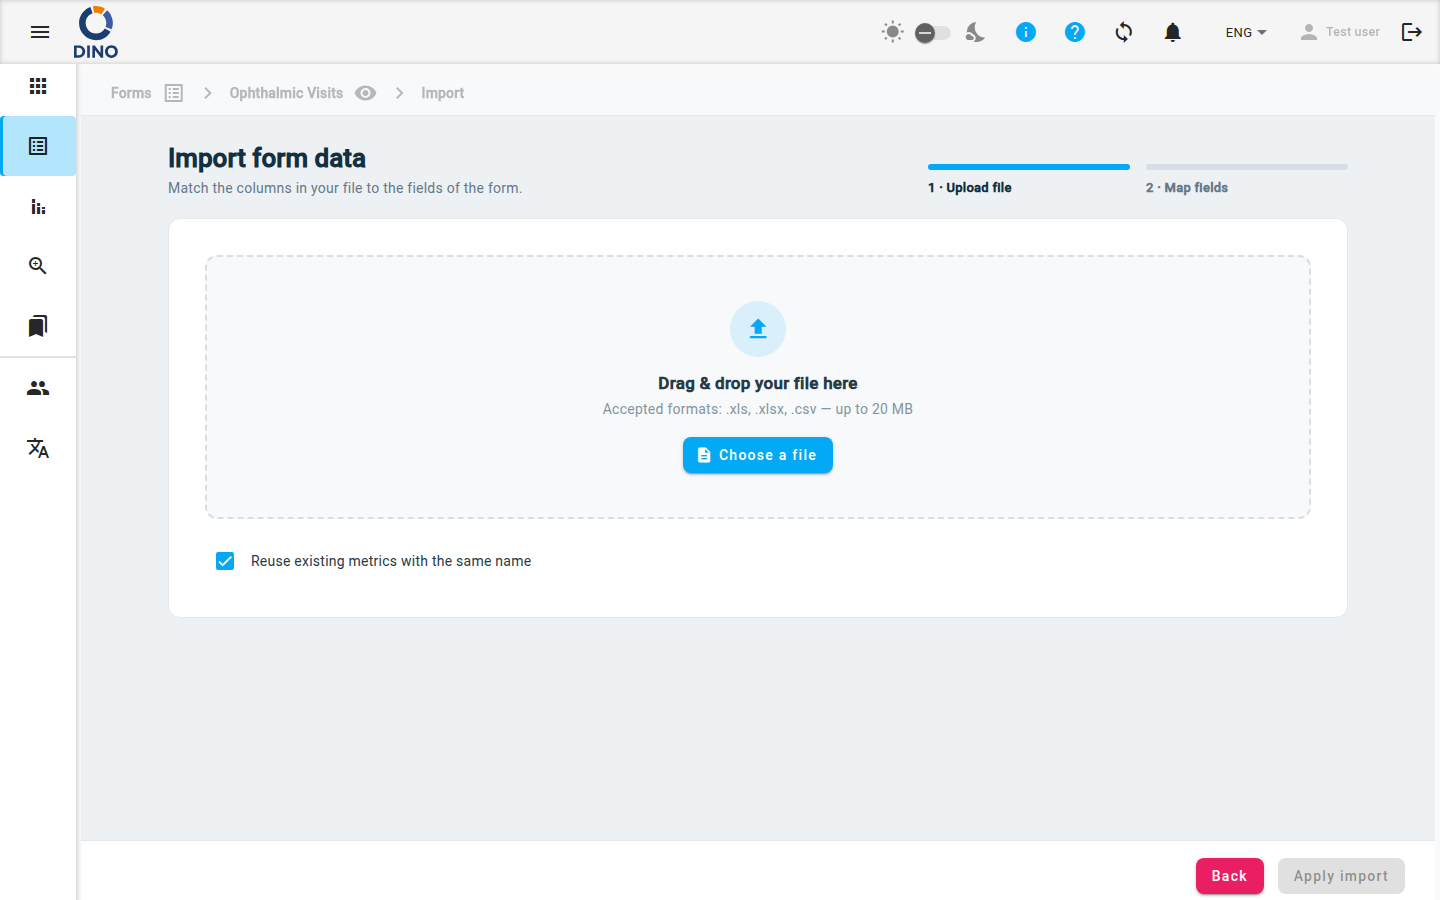
Access the Import Page
- Navigate to the Forms list and select a form schema.
- From the form’s data view, click Import (the toolbar button).
Step 1 — Upload File
The first step shows a drag‑and‑drop zone or a file picker.
- Accepted formats:
.xls,.xlsx,.csv - Maximum file size: 20 MB
To upload:
- Drag a file onto the dashed area or click Choose a file to browse.
- After selection, the file name appears in a chip along with the number of columns detected.
- (Optional) Leave Reuse existing metrics with the same name checked (the default) so that any metric in the file whose name matches a metric already in the system is linked to that existing metric instead of creating a duplicate. Uncheck it to always create new metrics.
- Click Next (or the stepper label “2 · Map fields”) to proceed.
File formats
Dino accepts the same file types used for standard data collection. Ensure your column headers are clear – they will be used as suggestions during mapping.
Metrics identified by ID
If a metric column in your file provides the metric's ID (UUID), that row is linked to the existing metric with that ID and no new metric is created. The ID takes precedence over the metric name, so this happens regardless of the Reuse existing metrics with the same name option (which only applies to matching by name).
Step 2 — Map Fields
After uploading, you see a table listing all columns from your file. Each row has three columns:
- File column – the original header from your file.
- Form field – a dropdown where you select the corresponding form field.
- Status – shows whether the column is mapped, ignored, or has an error.
Mapping Actions
- Select a form field – open the dropdown for a column and choose the correct field. You can search within the dropdown.
- Ignore a column – select the — Ignore this column — option in the dropdown, or click the Ignore button in the status column. Ignored columns are grayed out.
- Restore an ignored column – click the Restore button in the status column.
Auto‑match
Click Auto‑match to let Dino automatically pair columns with form fields based on name similarity. This is a good starting point – review and adjust mappings as needed.
Auto‑match works best with headers that match field labels exactly or contain similar keywords.
Repetition
If a selected form field is a repeating field (e.g., multiple phone numbers), a Repetition input appears below the dropdown. Enter the repetition index (0, 1, 2, …) to assign this file column to one occurrence of the repeating group.
Toolbar Summary
At the top of the mapping area, you can see three chips:
- Total columns – number of file columns.
- Mapped – columns that have been assigned to a form field.
- Ignored – columns you chose to ignore.
Use the Search columns input to filter the table by file column name.
Apply Import
When all desired columns are mapped and no errors exist, the Apply import button becomes enabled. Click it to start the import. While processing, a spinner appears. You can click Back to return to step 1 or cancel the import.
After a successful import, you are returned to the form’s data list, where the new submissions appear.
Duplicate mapping
If you map the same form field to more than one file column, a validation error is shown and the Apply import button remains disabled until corrected.