Locations
The Locations page lets you manage the geographic locations referenced by your forms, cases, and other metrics. You can add new locations, edit existing entries, import data in bulk, and export the current list.
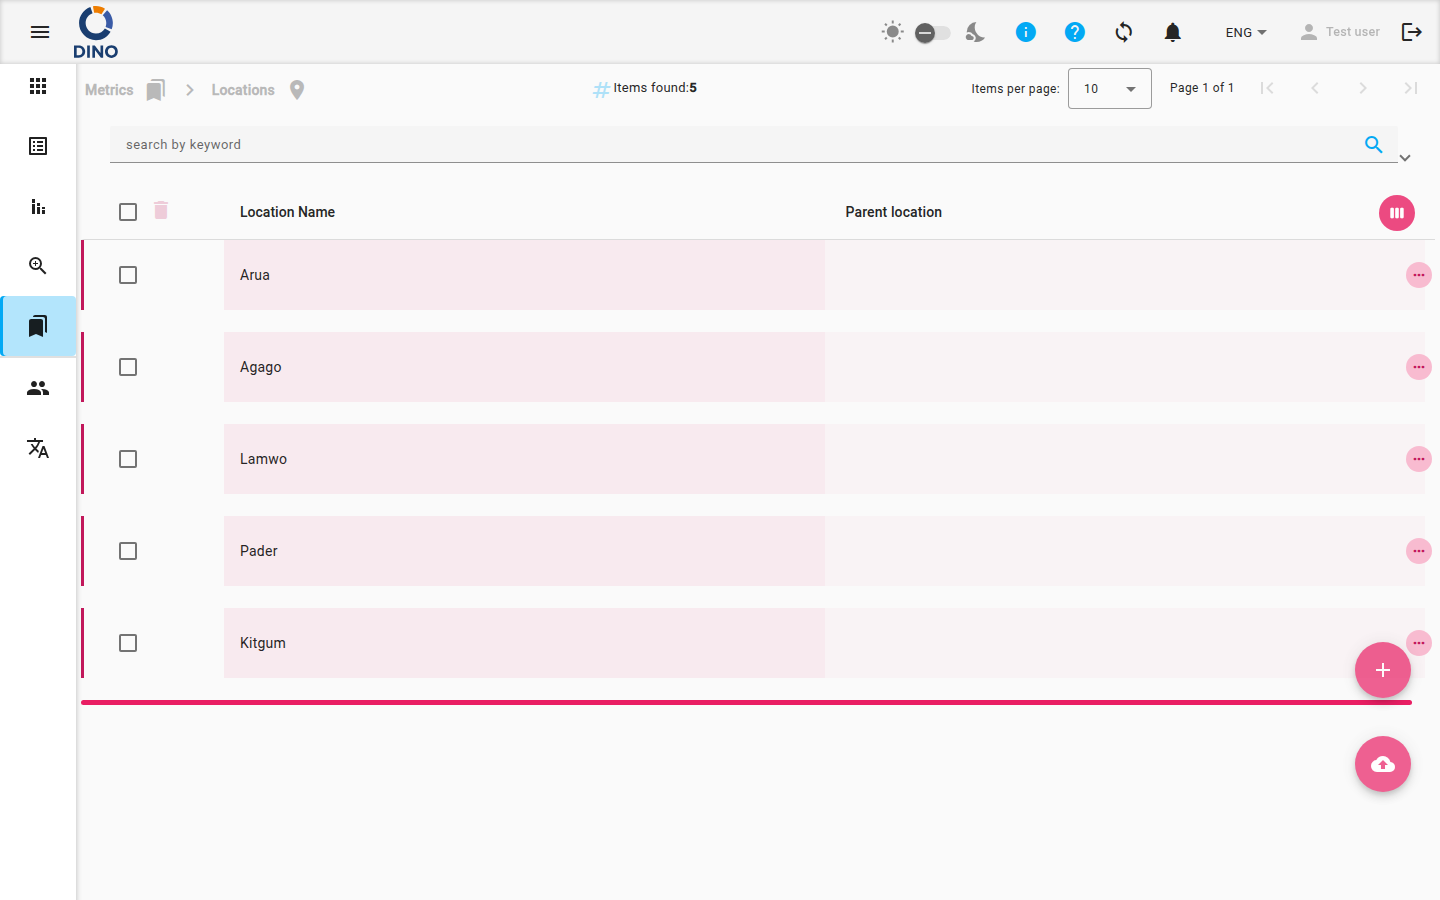
What you see
- Breadcrumbs – shows your current position in the navigation.
- Search & Filters – keyword search, date range picker, and configurable advanced filters (e.g., by metric, status, user). You can also save and load filter presets.
- Table – displays Location Name and Parent Location by default. Hidden columns (ID, Creation Date, Coordinates, Additional Attributes) can be shown via the Customize columns button (bottom right of the table header).
- Pagination – controls for navigating through pages.
- Bulk actions – select rows using checkboxes to delete or edit multiple locations at once.
- Floating action buttons – Add New (plus icon) and Import (cloud upload icon) remain available as you scroll.
Row actions
Each row has three quick actions (visible when hovering over the row):
- Edit – opens the location dialog to modify details.
- Delete – removes the location after confirmation.
- View – opens a read‑only dialog showing all fields.
Clicking a row selects it (highlights) and, if the list is expandable, reveals a detail panel with additional data.
Working with locations
Add a new location
- Click the Add New floating button (bottom‑right corner).
- In the dialog, fill in the required fields (e.g., Location Name).
- Optionally set a Parent Location, Coordinates, and Additional Attributes.
- Click Save.
Edit a location
- Click the Edit icon (pencil) on the desired row.
- Update the fields in the dialog.
- Click Save.
Delete a location
- Click the Delete icon (trash) on the row.
- Confirm deletion in the prompt.
Import locations from a file
- Click the Import floating button (cloud upload icon).
- Select a CSV or Excel file following the expected format.
- Map columns to location fields if needed.
- Click Import.
Bulk editing
Select multiple rows using checkboxes, then click the Edit button (edit_note icon) that appears above the table to update several locations at once.
Export the location list
- Click the Export button (cloud download icon) in the filters bar.
- Choose the export format (CSV or Excel).
- The file downloads automatically.
Related pages
- Metrics Overview – return to the metrics home.
- Cases – manage cases that reference locations.
- Organizations – manage organizations tied to locations.
- Projects – view projects associated with locations.
Deleting a location
Deleting a location may affect forms and cases that reference it. Ensure no active records rely on the location before removing it.