Aggregation
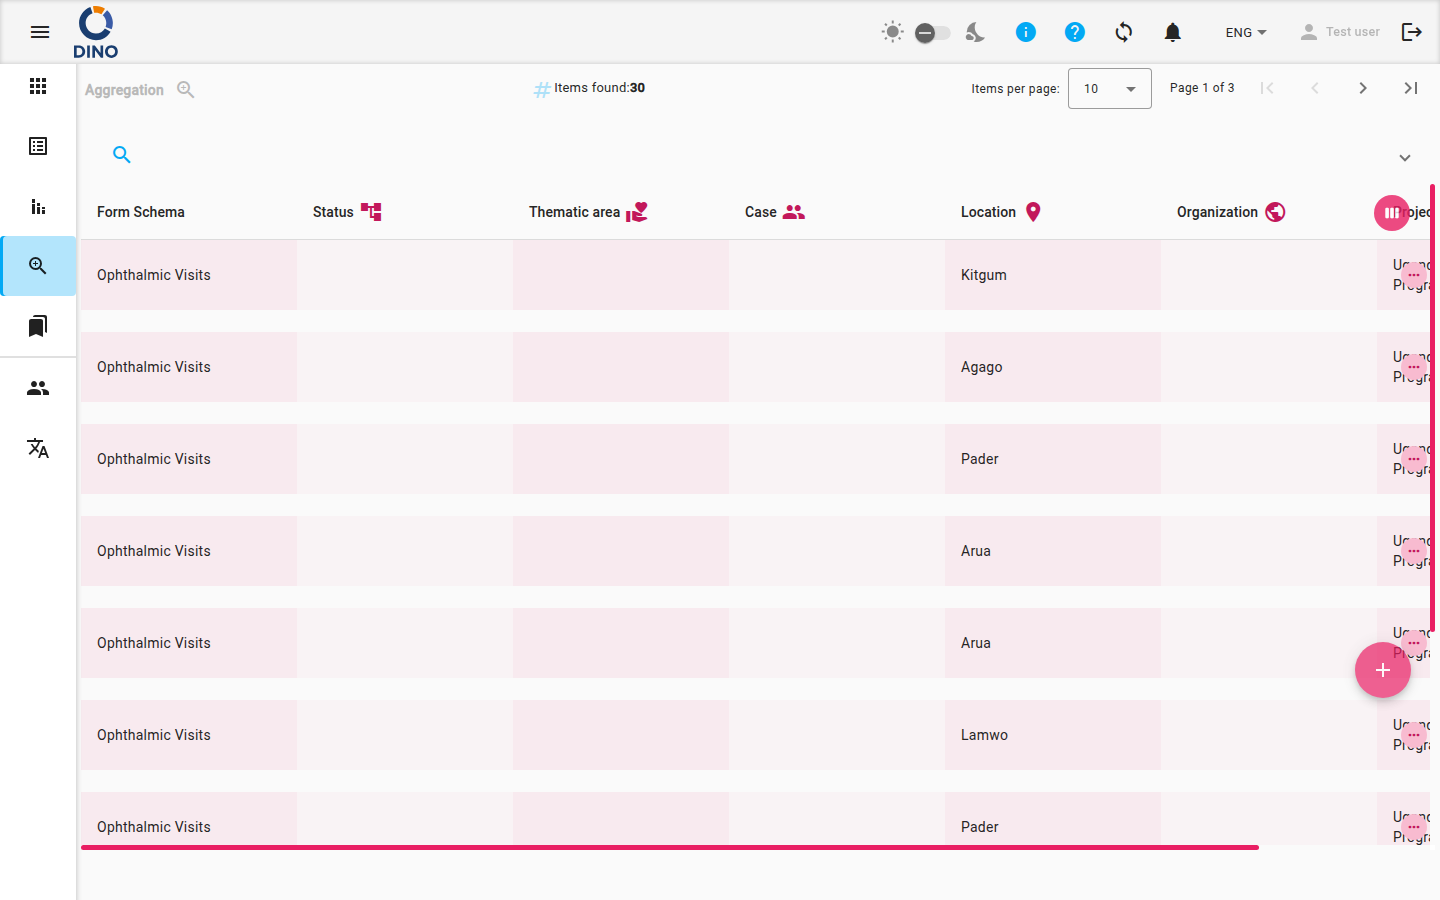
The Aggregation page gives you a centralized view of all form submissions across your projects. You can browse, filter, and take actions on submissions without having to open each form individually.
Viewing the Aggregation List
The main table displays one row per submission. By default you see the Form Schema and Status columns, but you can customize which columns appear using the View Week icon in the table header.
- Each row shows a status icon and, if the form has validation issues, a warning icon.
- Hover over a row to see a highlight; click anywhere on a row to select it and reveal available actions.
At the top of the list, the Items found counter and paginator let you know how many submissions exist and navigate through pages.
Filtering and Searching
A search bar and filter panel are available to narrow down the list.
- Click the search icon in the top bar to expand the filter panel.
- Use the keyword field to search across all fields.
- Use the date range pickers to filter by creation date.
- Additional filters appear for Area, Case, Location, Organization, Project, Form Status, and User. These are dynamic and respect your form’s metric definitions.
- Active filters are shown as chips below the filter bar – click the cancel icon on a chip to remove it.
Preset filters
The Aggregation page does not support saved filter presets. You can combine filters each time you need a custom view.
Row Actions
After selecting a row, the action icons appear in the Actions column on the right side of the table.
| Icon | Action | Description |
|---|---|---|
visibility |
View | Open the submission in read-only mode. |
create |
Edit | Modify the submission data. |
printer |
Generate a PDF of the submission. | |
delete |
Delete | Remove the submission after confirmation. |
Click More Horiz (three dots) to see additional actions for that row. The Print and Delete actions ask for confirmation before executing.
Creating a New Submission
The floating + button at the bottom right of the screen lets you start a new submission.
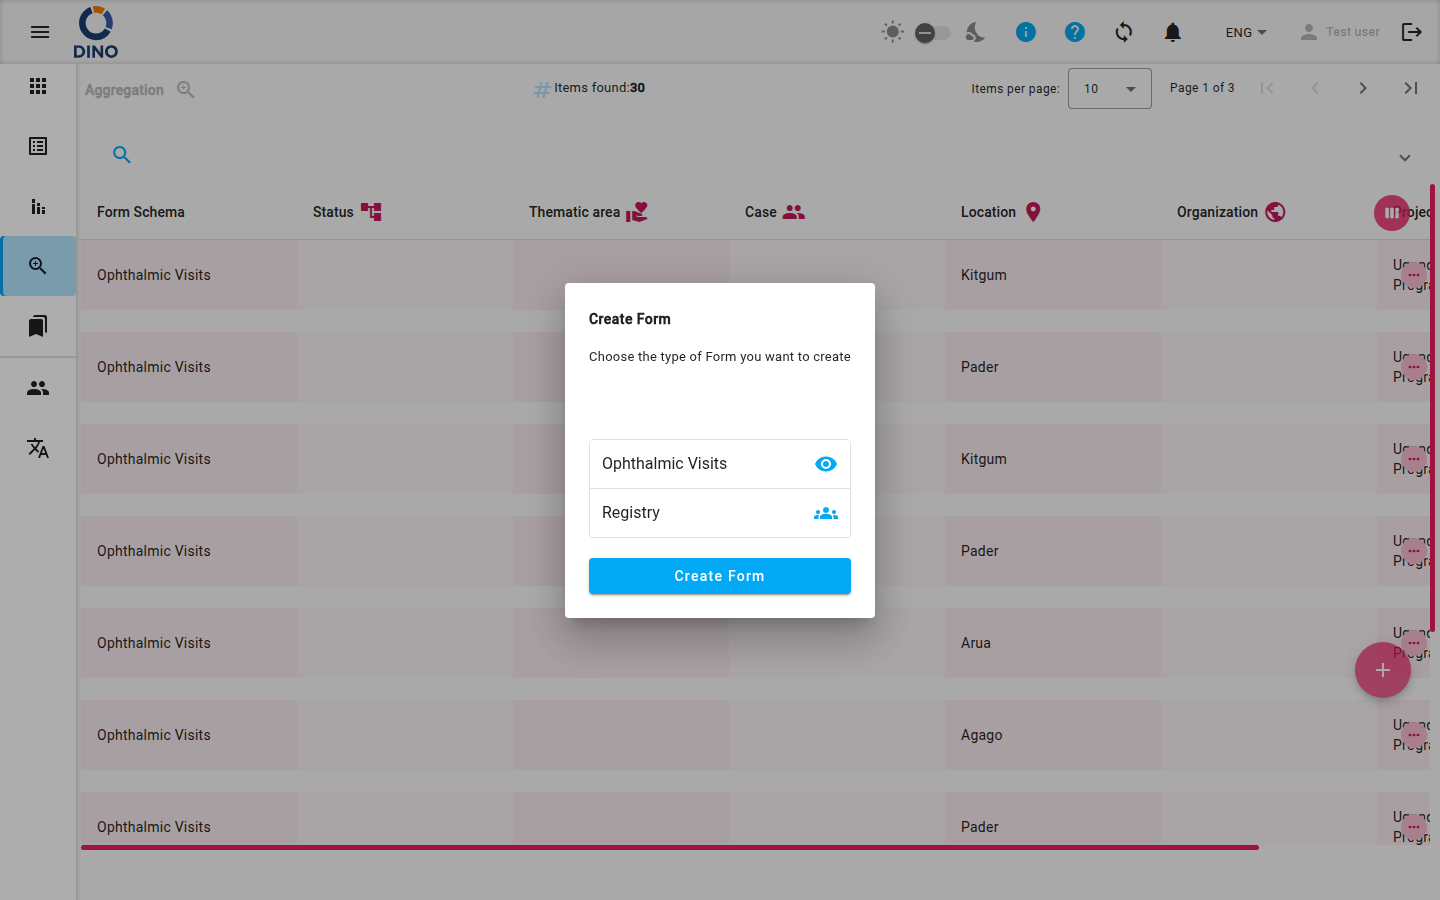
- Click the + button. A dialog opens showing available form schemas.
- Select or search for the form schema you want to use.
- After selection, you are taken directly to the Edit Form page to fill in the data.
Printing a PDF
You can generate a PDF of any submission that includes the form schema label, active metric names, and the filled‑in data.
- On the row you want to print, click the Printer icon (or use the More Horiz menu if available).
- Confirm the action when prompted.
- The PDF opens in a new browser tab or downloads automatically.
The PDF header includes the form schema title and all metric names currently active in the system.
Metric availability
The printed PDF includes only the metrics that are active at the moment you trigger the print. If a metric was added after the submission was created, it won’t appear.