Cases
The Cases page gives you a centralized workspace to track and manage individual cases. Each case is a structured record that can hold a name, code, image, parent relationship, notes, and additional attributes. You can create new cases, edit existing ones, view details, delete records, and export your case list — all from a single interactive table.
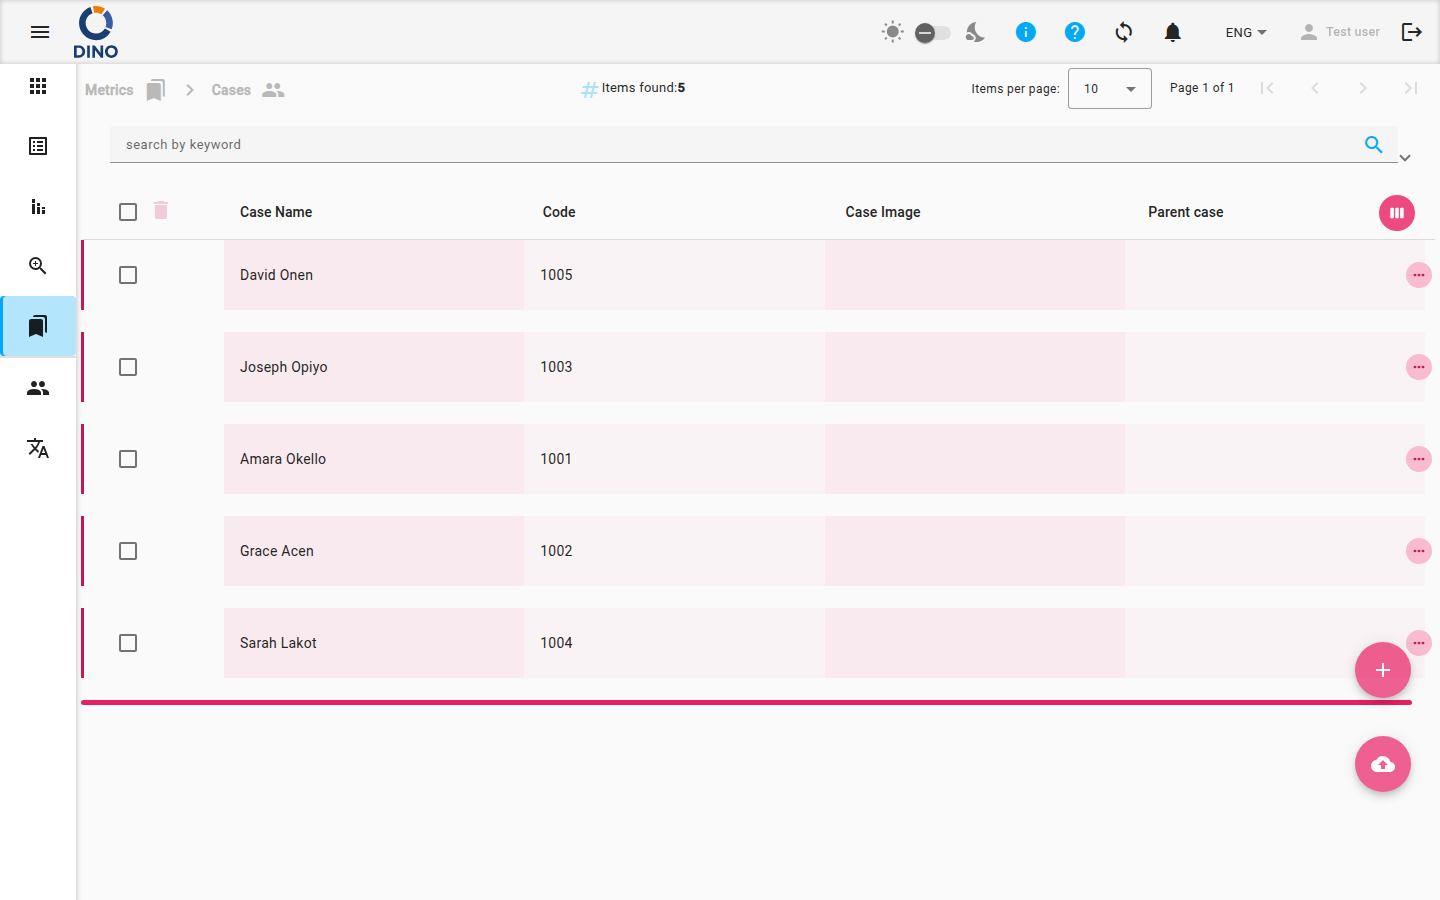
Table overview
The main table displays the following columns by default:
- Case Name – The name you assign to the case (sortable).
- Code – A system-generated or manually assigned code (read‑only after creation).
- Case Image – An uploaded image file representing the case.
- Parent case – The name of any parent case this case belongs to.
Additional columns (such as ID, Notes, Creation Date, and Additional Attributes) are hidden by default. You can customize which columns appear by clicking the Customize columns button (eye icon) in the table header.
Actions on a single case
On the right side of each row, you’ll find icons for the following actions:
- Edit – Opens a dialog to modify the case details.
- Print – Generates a printable PDF card for the case.
- View – Opens a read‑only dialog to inspect case information.
- Delete – Opens a confirmation dialog to permanently remove the case.
Click the More icon (three vertical dots) to see all available actions if some are hidden.
Bulk actions
Select multiple cases using the checkboxes in the first column. When at least one case is selected, a Delete button appears at the top of the table. You can delete all selected cases at once.
Bulk deletion is permanent
Deleted cases cannot be recovered. Use the bulk delete action carefully.
Creating a new case
- Click the Add New floating action button (plus icon) at the bottom‑right of the page.
- A dialog will open. Fill in the required fields:
- Case Name – Enter a descriptive name.
- Code – (Optional) Provide a unique code. This field is read‑only after creation.
- Case Image – Upload an image file.
- Parent case – Optionally link this case to an existing parent case.
- Notes – Add any relevant notes.
- Click Save to create the case.
Importing cases
Use the Import floating action button (cloud upload icon) to bulk‑upload cases from a file. Supported formats are defined by your system administrator.
Filtering and searching
The search bar at the top lets you filter cases by:
- Keyword – Searches across all displayed fields.
- Date range – Filter by creation date (From / To).
- Additional filters – Select from predefined filters such as metric, status, user, or user group.
After applying filters, you can save the combination as a preset for quick reuse. To save a preset:
- Open the filter panel.
- Enter a name in the preset field.
- Click Save.
To apply a saved preset, select it from the list and click Apply.
Exporting cases
Click the Export button (cloud download icon) in the filter bar. Choose the export format (e.g., CSV or Excel) and select which columns to include. The exported file will contain all currently visible cases, respecting any active filters.
Customizing the table
- Sort – Click any sortable column header (e.g., Case Name, Creation Date) to order the table.
- Column selector – Open the column selector dialog to show or hide columns.
- Expand rows – Some cases may have sub‑items (other cases linked as details). Click a row to expand it and see the related records.
The page also displays a breadcrumb trail at the top so you can navigate back to the main Metrics section.
Related pages
- Metrics Overview – Return to the main metrics dashboard.
- Thematic Areas – Organize cases by thematic area.
- Locations – Associate cases with geographic locations.
- Organizations – Link cases to organizations.
- Projects – Group cases under projects.